- Home
- Intro to blackwork
- Double Running Stitch
Double Running Stitch Tutorial: How to Use It for Blackwork Embroidery
What is Double Running Stitch?
Imagine creating stunning blackwork embroidery that looks identical on both the front and back.
Sounds like a dream come true? 🎨✨
For many embroiderers, achieving perfectly reversible stitches can be tricky—but that’s where the double running stitch comes in! This simple but powerful technique makes blackwork embroidery easier, neater, and more professional-looking.
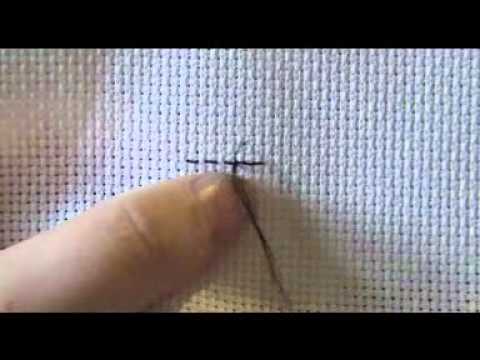
How to Do Double Running Stitch (Step-by-Step Guide)
It’s easier than you think! Just follow this simple method:
- Stitch every other stitch along a line.
- Come back along the same line, filling in the gaps.
Pro Tip: Using evenly woven fabric (like Aida or linen) makes this process even easier—ensuring consistent, even stitches.
🎥 Watch the quick video below to see the technique in action!
Important Considerations for Following a Pattern
Stitching along a straight line with the double running stitch is simple. But what about more complex designs?
That’s where things can get tricky—unless the pattern is pre-planned for you!
Pre-Planned Stitching Routes Save You Time
In my free blackwork design, I’ve included colored guideline lines to show you:
- The best stitching route for outlines
- How to fill intricate areas smoothly
Want extra help? You’ll find these same stitch guides in my downloadable starter patterns, making it even easier to get started with blackwork embroidery.
Double Running Stitch vs. Backstitch: Which One Should You Use?
"Why not just use backstitch?"
While backstitch works well for many embroidery projects, it falls short in blackwork embroidery.
Double running stitch creates crisp, clean lines—a signature look of blackwork.
- It’s completely reversible, so the front and back look the same.
- Backstitch leaves messy, uneven stitches on the reverse side.
Check out the comparison photo below! Can you see the difference?

Can you see how thick and untidy the one on the right looks? I stitched that with backstitch whereas for the one on the left I used double running stitch.
Look closely at the corners on the right hand example. Did you spot those diagonal stitches? On some fabrics that shadowing might be visible from the front of the work.
A Simple Trick for Straighter Lines in Blackwork
Ever noticed your stitches looking a bit wobbly?
Don’t worry—it’s not you! It’s just how the fabric reacts to tension. But here’s an easy trick to keep your lines smooth and straight:
When filling in the gaps of your double running stitch, adjust your needle placement:
- Bring the needle up just below the previous stitch.
- Take it down just above the same stitch.
Why does this work? This technique reduces stitch distortion and helps maintain perfectly straight lines in your blackwork embroidery.
Try it out and see the difference for yourself!

Choosing the Right Number of Floss Strands
The number of strands you use affects the thickness and visibility of your stitches. Here's a quick guide:
- For Outlines: Use 1–2 strands for crisp, clean lines.
- For Filling Patterns: Use 1 strand for delicate, intricate details.
- For Shading Effects: Use 2 strands in darker areas to create smooth shading transitions.
For example: In my free pears pattern, shading is achieved by using different strand thicknesses—a simple trick for adding dimension to your blackwork!
Tip: Always check the instructions in your kit or pattern, as recommended strand counts may vary.
How to Carry Your Thread in Blackwork Embroidery
Moving to a new stitching area? Here's what to do:
- If it’s far away ➝ Fasten off and start fresh. This prevents unwanted visible threads.
- If it’s a short distance ➝ Use your outline stitches to travel. Just pass your thread through the back of the existing stitches.
⚠ Avoid carrying thread across open areas—it might show through from the front!
How to Start and Secure Your Thread
A well-secured thread ensures neat, durable embroidery. Here’s how to start and finish your stitches the right way!
Fastening On: Starting Your Thread
Away Waste Knot Method (Best for New Projects)
- Tie a knot at the end of your thread.
- Insert the needle from the front side of the fabric, away from your starting point.
- Stitch as usual, leaving the knot in place.
- Once you've stitched a few inches, snip off the knot and weave the thread end under the stitches.
💡 Why use this method? It keeps the back of your work tidy and prevents loose threads from pulling through!
Adding a New Thread (If Stitches Are Already in Place)
If you’re running out of thread midway through a project, don’t worry! Here’s how to seamlessly add a new strand:
- Slide the needle under a few stitches on the back of your work to anchor the new thread.
- Pull through gently and start stitching as usual.
Fastening Off: Securing Your Thread at the End
To keep your work from unraveling, secure the thread properly before cutting:
Option 1 (Best for Outlines):
Weave the thread under a few back stitches to secure it.
Option 2 (Extra Secure Knot):
- Thread the needle under a few stitches.
- Create a tiny loop and pass the needle through it.
- Pull tight to form a small, invisible knot.
💡 Pro Tip: Try to fasten off under an outline stitch whenever possible—this helps hide the loose ends for a cleaner finish!
Final Stitching Tip
Before cutting your thread, do a quick check:
- Will your thread reach the other side of the shape you’re filling?
- If not, fasten off early and start fresh to avoid awkward gaps.
Take the First Stitch Towards Blackwork Mastery
I know—that was a lot of information!
It’s natural to feel a little overwhelmed. But don’t let that stop you from learning double running stitch.
💡 The best way to learn? Just start stitching!
Here’s a simple first step:
- Grab a scrap piece of fabric (Aida or linen).
- Thread your needle with one or two strands of floss.
- Practice the double running stitch using the guide above.
You’ll be surprised at how quickly you master it! And once you do, you’ll unlock the secret to creating reversible, professional-looking blackwork designs.
Need a little extra guidance? Try another free blackwork pattern—designed specifically to help you practice and perfect this technique!
What did you think of this page?
Did it give you all you needed or did anything else spring to mind? If there was something missing give me a shout – or let me know if this page proved helpful (do let me know which page you are commenting on).
Would you like a direct reply? Just pop your email address below, and I'll be in touch.
Stay connected between projects
If you’d like occasional updates from my embroidery room, including new patterns, gentle tips, and little things I think you might enjoy, you’re warmly invited to join the Stitchin’ Times newsletter.
No pressure. Just a friendly note now and then to keep you inspired.
You Might Like These
Attaching beads to cross stitch and blackwork projects
A super simple way of attaching beads to your cross stitch and blackwork, with step by step instructions
How to Do Blackwork: stitch outline tips and techniques
Discover How to Do Blackwork: Is a stitch outline necessary for all blackwork projects or can it be left off to create an elegant, subtle design?
Enjoy this free blackwork pattern and learn double running stitch
Download this free blackwork embroidery pattern, perfect for beginners. Includes step-by-step instructions to create a beautiful Harvest Time coaster.


Copyright © Carol Leather - 2006-2024
About Me - Contact Carol - Privacy Policy - Site Map - Testimonials
Please do not copy the content of this site. It is protected by Copyscape.
Copyright © 2006- www.needlework-tips-and-techniques.com All rights reserved