- Home
- Crazy Quilting Ideas
How My Crazy Quilting Ideas Changed as I Embellished a Block
Quick Links to other pages featuring this block
As you work on your quilt block, crazy quilting ideas often change and evolve.
By responding to the unique characteristics of your materials, you allow for a more organic, dynamic design. Make necessary changes to tap into your creative potential, resulting in a truly one-of-a-kind piece.
Although you might have specific design concepts at first, these may alter as you keep adding embellishments, creating a piece that evolves with each stitch.
I found this was the case with my blue/green block that you may have seen snippets of throughout the site.
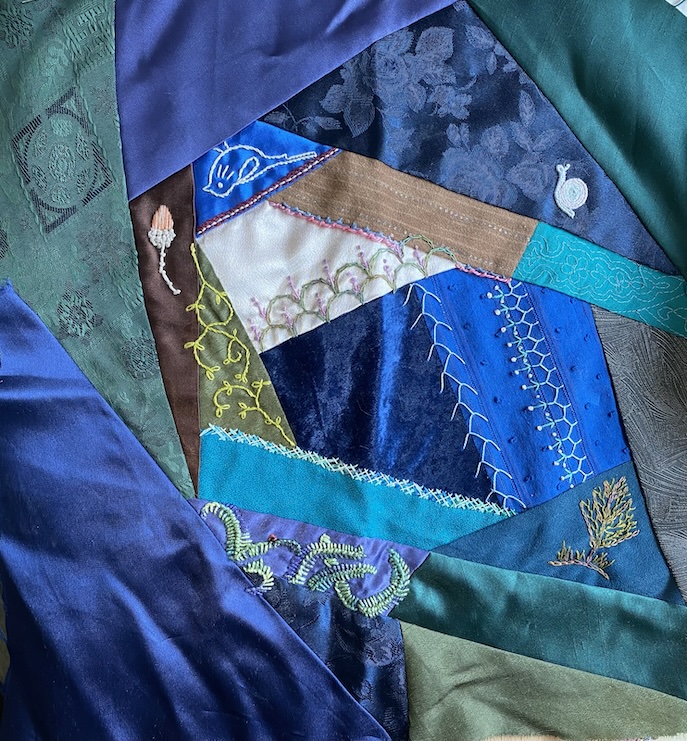 The first crazy quilting ideas I had for the block
I pieced it from silk, satin and other remnants throwing a cream, brown, ginger and grey patch in amongst the dark blues and greens.
I had no particular theme or organisation in mind apart from creating an interesting visual contrast and using up some of my scrap fabrics.
Combining fabrics with different textures, colours, and patterns is part of the joy in achieving a visually appealing crazy quilt.
Experiment with pairing light and dark values, smooth and rough textures, or bold and subtle patterns to create a dynamic composition.
Embroidering the seams and adding the odd motif, I found the block wasn't speaking to me. Elements from nature, including a snail, acorn, little bird, mini tree, and leaves, were added in an attempt to bring it to life. Unsure of where to take it next, the partly done block ended up stored in my studio.
A Butterfly Changed Everything
Rarely buying new fabrics for my crazy quilt blocks, I prefer recycling or repurposing existing materials to reduce waste and save resources.
Thrift shops are a wondrous place for crazy quilters. Pre-owned men's silk ties and young children's clothes often yield beautiful, unexpected patterns and textures that I find irresistible and love to incorporate into my designs.
One day I found a blouse covered in butterflies and felt sure it would come in useful for something.
When incorporating unusual materials or motifs, consider how they can be used to add surprise and interest to your design. Ask yourself how the element can be used to tell a story or evoke a particular mood or atmosphere.
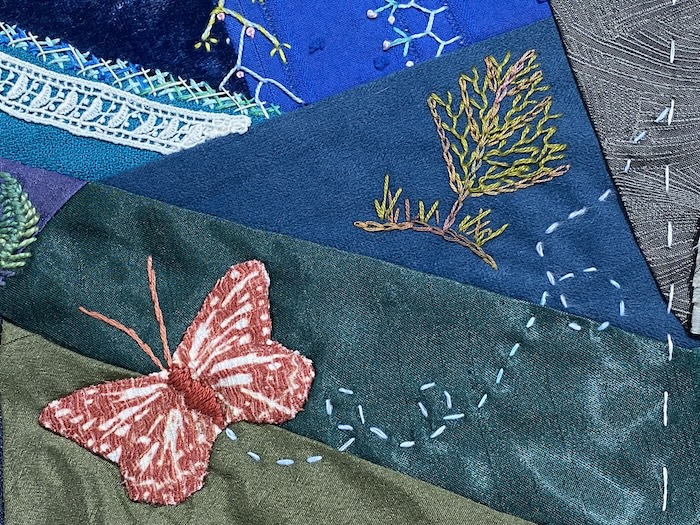
And indeed it did. I decided to cut out one of the butterflies and appliquéd it to my quilt block. Then, of course, it needed a running stitch "flight line" which I managed to carry over three greenish patches at the bottom right of the block.
You know how things go through your mind, out of the blue? Well, I suddenly saw the butterfly was flying over green fields!
When a breakthrough idea strikes, take the time to explore its possibilities, considering what elements would enhance the theme or story you're trying to convey and how they can be seamlessly integrated into your design.
In this case, the idea of green fields led me to re-evaluate the colour palette and fabric choices for the entire block.
However, this made me take another look at the way I had pieced the block. One fabric piece in particular was grabbing my attention, and not in a good way.
It Was Too Big And Out Of Place!
Being two to three times bigger than the other patches in the block, the large blue triangular patch at the bottom left me at a loss of ideas for embellishment. It dominated the composition and disrupted the overall balance.
Regularly step back from your work and look for areas that feel out of place. Be willing to make changes, even if it means unpicking seams or reworking entire sections.
In addition I realised it was the wrong colour. If I had fields at the bottom on the right, it seemed odd having blue in that other corner. Maybe it should also be greens or earth tones to signify the continuation of the land rather than sky?
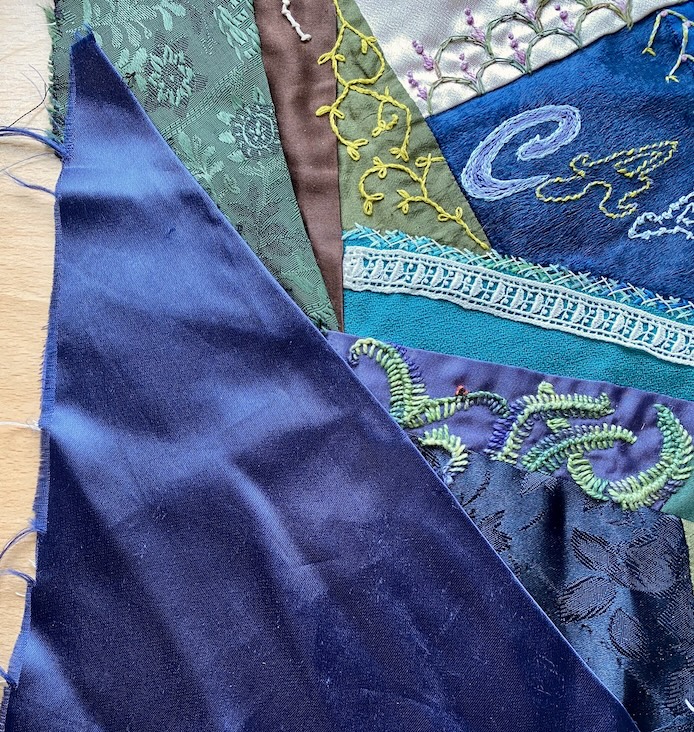
It Had to Go
As it had no embroidery or other decoration I decided to unpick it and replace it with smaller more appropriately coloured patches.
There was only one small issue. My blanket stitch ferns very slightly encroached onto the blue triangle. But that could be redone afterwards so I carefully unpicked the seam.
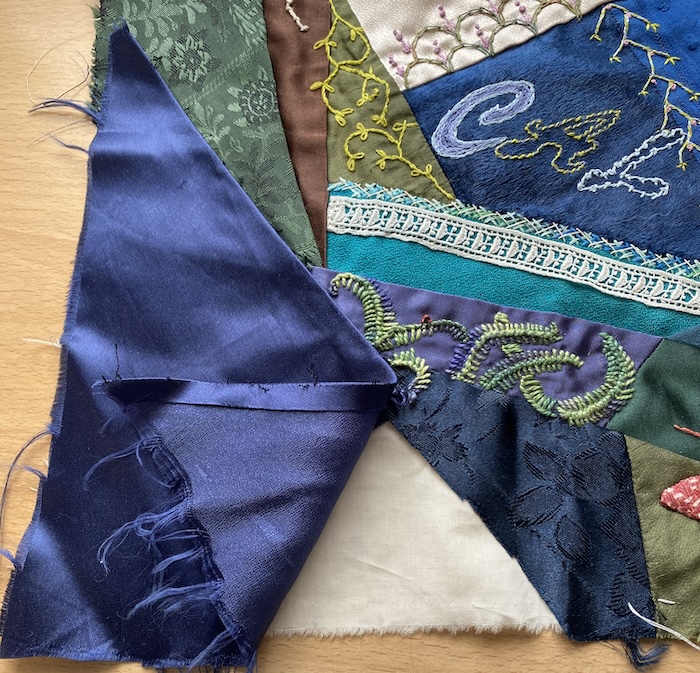
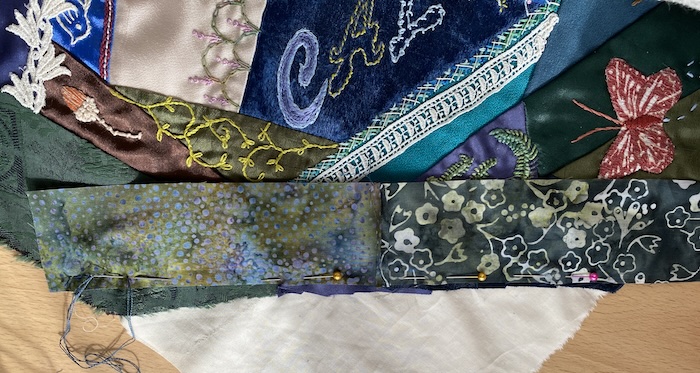
I found two lovely cotton fabrics and seamed them together to make a long strip that would cover some of the calico base.
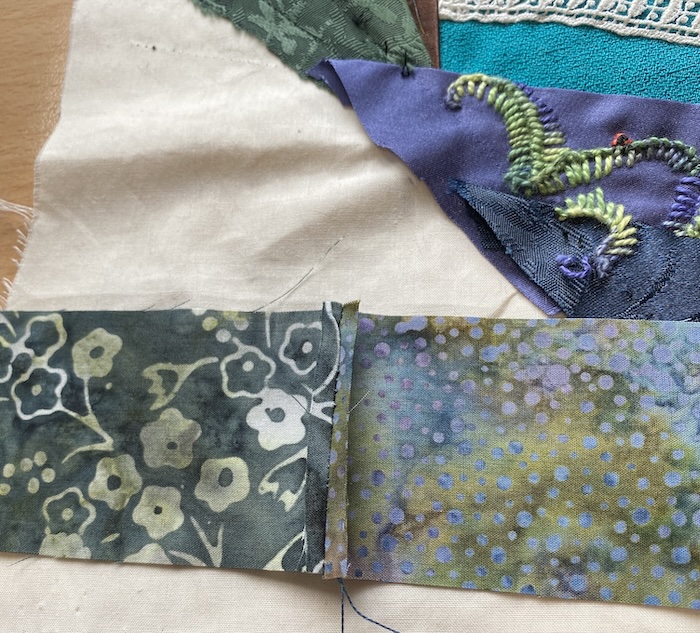
I pinned the strip in place and used backstitch to attach it to the block.
This page shows the whole process of creating a crazy quilt block.
I Needed to Tie it All Together
I was happy completing the corner with one further piece of fabric, and wanting to return to the silk fabrics I looked through my silk tie collection. Luckily I found just the thing.
I sat and unpicked the stitching, removing a lovely piece of purple silk that had been used to line the point, and putting that aside for future work.
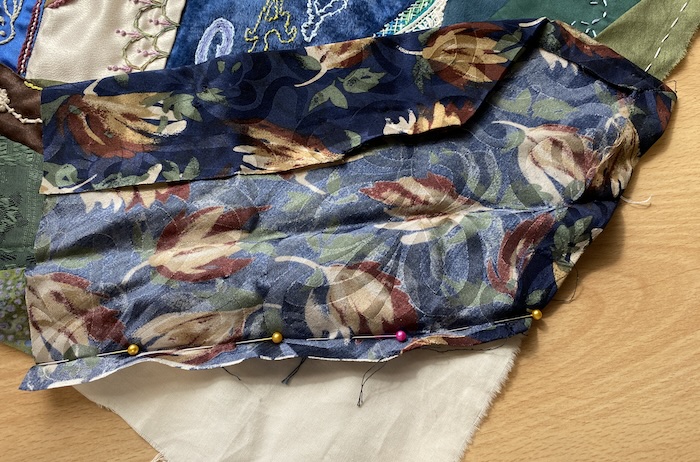
Using the old seam line I pinned and stitched the tie silk in place.
To tie together diverse elements, look for common threads such as colour, texture, or theme. Use these connections to create a sense of continuity throughout the block. In this case, the addition of silk tie fabric made the corner blend in instead of standing out like a sore thumb.
Look at the Difference
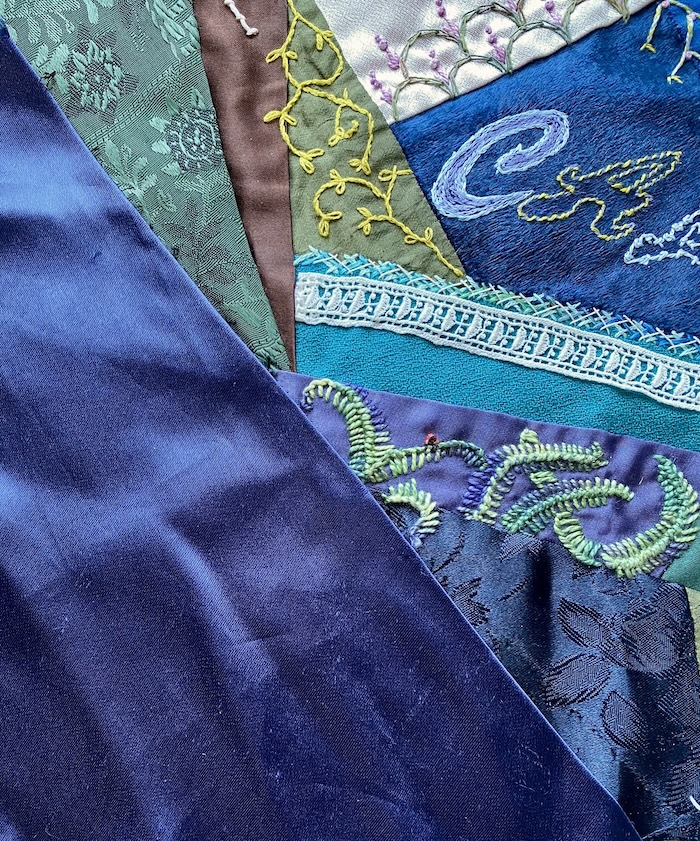
This is the new corner...
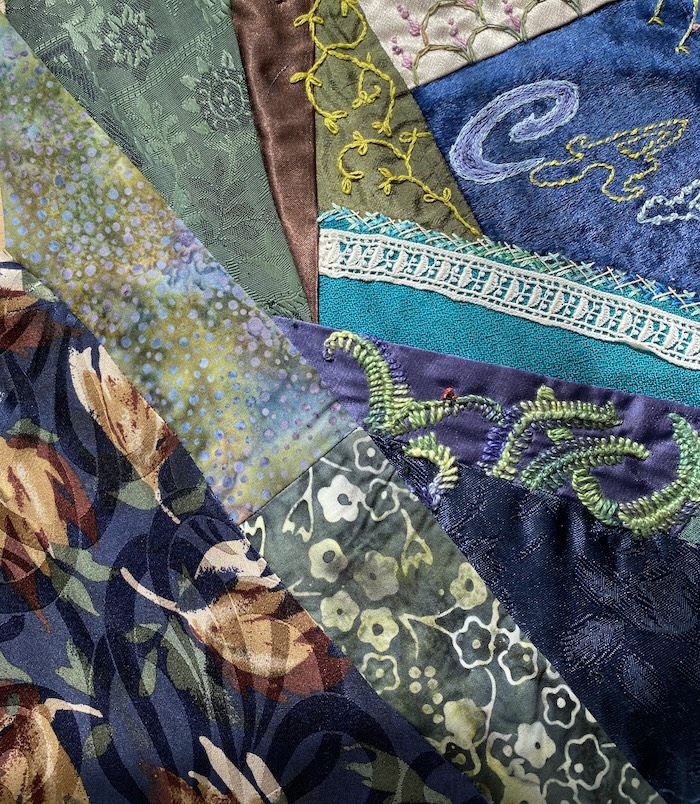
compared to the original...
More Crazy Quilting Ideas
The tie silk still had a blue background, but not being a solid colour it was less obtrusive. It also picked up on the brown elements throughout the block.
I was still left with a small blue patch below the blanket stitched ferns. My idea here was to turn that into a small pond. So I sketched out a lily pad using a single strand of floss and double running stitch.
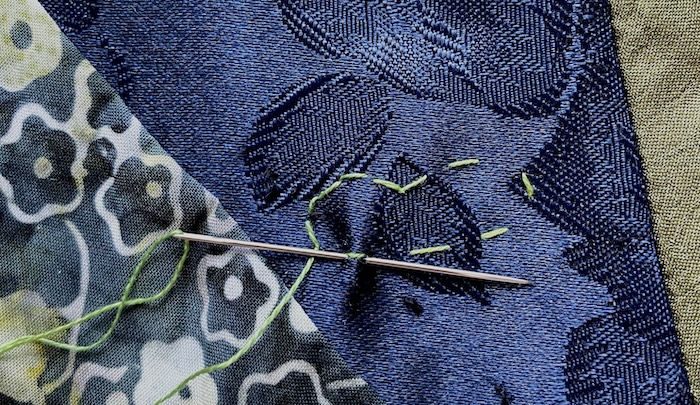
I chose a variegated pearl cotton and blanket stitch to fill in the shape I had created, taking the needle down in the centre each time and angling the stitches. Due to the patch being along the edge of the block, I stitched in the hand rather than using an embroidery hoop.
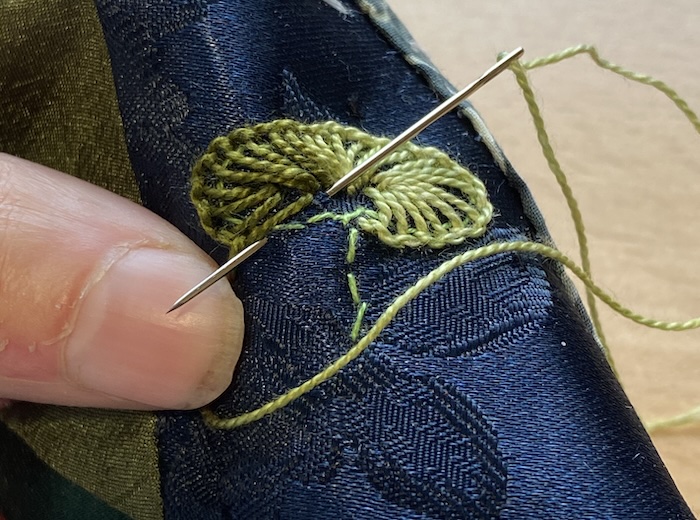
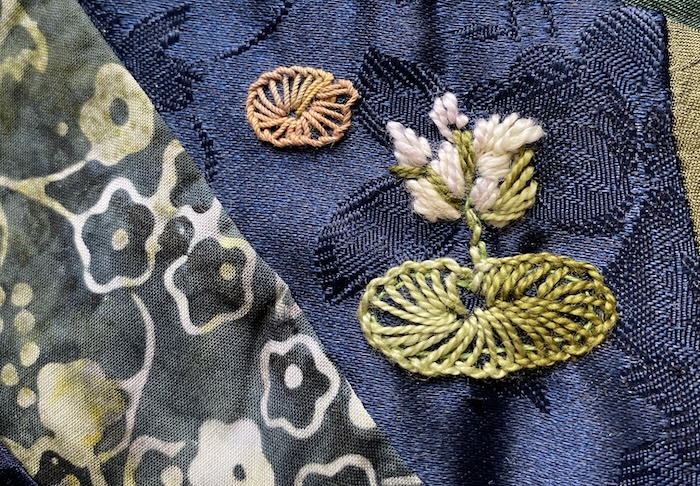
The photo below shows the completed lilies. I wasn't aiming for realism, just an indication. When I asked my husband what the stitching was meant to represent he said water lilies, so I am happy they do the job.
I have more ideas for the new corner patches, along the lines of grasses, reeds and a flower meadow. However, if you have any ideas I would be delighted to hear from you. You can use the contact me page to get in touch.
I will update this page once the corner is finished.
Stay connected between projects
If you’d like occasional updates from my embroidery room, including new patterns, gentle tips, and little things I think you might enjoy, you’re warmly invited to join the Stitchin’ Times newsletter.
No pressure. Just a friendly note now and then to keep you inspired.


