- Home
- Cutwork Embroidery
Cutwork Embroidery Techniques: A Step-by-Step Guide for Beginners
Cutwork embroidery, a timeless surface technique, has been fascinating stitch enthusiasts for centuries with its intricate beauty.
Cutwork was the forerunner to the more ornate Richelieu and Reticella techniques.
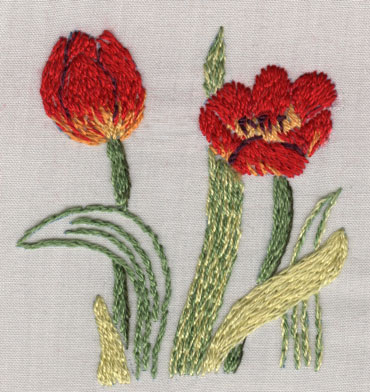
Here, we'll unravel the basics of cutwork embroidery using my simple tulip pattern.

By the end of this tutorial, you'll craft striking cutwork pieces in your thread of choice—whether classic white, soft ecru, or full colour—tailoring your project to express your unique style.
The stitch is also used in hardanger embroidery and the diagrams on my free pattern may also help to guide you, although keep in mind that hardanger is a counted technique.
Transferring your cutwork design onto the fabric
To start the surface embroidery, first transfer your design outline directly onto the fabric.
If your chosen picture isn't a cutwork embroidery design, simply redraw the outline with parallel lines spaced about 1/8th inch apart.
Draw a single dotted line across the fabric area that will eventually be cut and discarded. This will mark the buttonholed branch that will hold the design together. (The photo further down this page illustrates this process.)
I use a disappearing ink pen to transfer patterns onto the fabric, a method both precise and efficient. These amazing pens come in two varieties.
Time-Sensitive Pen: This pen's marks subtly fade over time, perfect for intricate designs. Ensure your work is finished before the ink disappears.
Water-Sensitive Pen: This pen allows for expansive, intricate designs that vanish with a mere touch of water, offering the flexibility to work at your own pace, secure in the knowledge that errors can be effortlessly washed away.
Method
When tracing patterns onto fabric, start by laying the fabric over the printed outline.
If it's a dense weave, you'll likely need additional light.
During daylight, position the fabric against a window for natural illumination, or use a light pad for a more controlled light source.
Outlining and laying the buttonhole bars

Place your fabric in the hoop, then work close running stitches along each doubled line, being careful not to pull too tight to avoid puckering.
When you hit a single dotted line, make a long stitch across the open area of your design. Then, bring your needle up through the doubled running stitch on one side and down on the other, maintaining the pattern.
Repeat this twice more to give you three long stitches.
You'll end up on the opposite side to where you started. To return to your starting point, simply execute a buttonhole stitch over the three threads.
Tip: Switch to a blunt tapestry needle when buttonholing to avoid piercing the fabric.
Don't take your needle through the fabric until you reach your running stitches. Then, continue until you reach the next buttonhole bar.
Continue stitching until every design line is outlined with a double running stitch or a buttonhole bar covers the pencil marks.
Working the Buttonhole Stitch

Setting Up For Success...
To tackle those buttonhole stitches effectively, start by preparing your work:
Mark the cut out areas: Use your disappearing ink pen to mark a cross in each area that will be cut out later.
Orient your corded edge: Double-check that the corded edge of the buttonhole stitch is on the side that will be cut.
Hoop or No Hoop?
For buttonhole stitch, I favour using an embroidery hoop to keep the fabric taut.
This method requires a stabbing motion — inserting the needle fully and then pulling it through — rather than the simple in-and-out movement typical of direct hand stitching.
The Secret to Neat Buttonhole Stitches
Here's the key to achieving beautiful, even stitches:
Stitch at right angles: To achieve a clean, professional finish, ensure your buttonhole stitches intersect your running stitches at right angles.
Lift the corded edge: Gently lift the corded edge with your needle as you guide it into the fabric, ensuring a close, straight stitch that avoids wobbles.
Remember, It's Okay to Be Imperfect
Hand embroidery revels in imperfection, embracing the human touch over mechanical precision—so let go of perfectionism; it's hand stitching, not machine work.
Cutting away the unwanted fabric
Once you've finished stitching, carefully remove excess fabric with your fine-pointed embroidery scissors.
Tips for cutting
Fold the fabric and, from the reverse side, gently snip the center of each unwanted area.
Unfold and cut carefully, ensuring you avoid the fabric's edges and the bars. Rest assured, any stray fibers will vanish after washing your embroidery.
The Final Touches
With the excess fabric removed, your cutwork embroidery is almost complete. Take a moment to admire your handiwork, and get ready to enjoy your beautiful piece.
Take pride in your creation, relishing the fruits of your labor, and before you know it, the allure of cutwork embroidery might just snag you for your next creative endeavor.
What did you think of this page?
Did it give you all you needed or did anything else spring to mind? If there was something missing give me a shout – or let me know if this page proved helpful (do let me know which page you are commenting on).
Would you like a direct reply? Just pop your email address below, and I'll be in touch.
Stay connected between projects
If you’d like occasional updates from my embroidery room, including new patterns, gentle tips, and little things I think you might enjoy, you’re warmly invited to join the Stitchin’ Times newsletter.
No pressure. Just a friendly note now and then to keep you inspired.
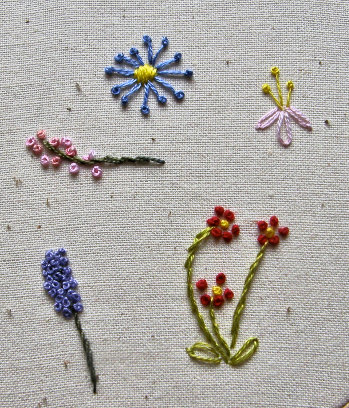
You Might Like These
Learn Split Stitch Embroidery: Techniques, Tips & Ideas
Learn the split stitch, a versatile embroidery stitch for outlining and filling areas of your design. Tips & tricks to improve your stitching skills.
Free Hand Embroidery Designs and Lessons
Discover a variety of free hand embroidery designs and lessons. Learn techniques like blackwork, cross-stitch, and hardanger with detailed patterns & tutorials
Embroidery Stitch Sampler: A Creative Way to Practice and Explore
Discover how an embroidery stitch sampler can help you practice stitches, experiment with techniques, and grow your confidence—no perfection required!


Copyright © Carol Leather - 2006-2024
About Me - Contact Carol - Privacy Policy - Site Map - Testimonials
Please do not copy the content of this site. It is protected by Copyscape.
Copyright © 2006- www.needlework-tips-and-techniques.com All rights reserved