- Home
- Redwork Embroidery
Redwork Embroidery: A Journey Through Time
Let’s take a fun look at redwork embroidery, a simple yet beautiful craft.
In this guide, we’ll talk about where redwork comes from and how you can try it yourself.
Ready to give it a go?
The Roots of Redwork Embroidery
First, let's take a step back in time and explore the humble beginnings of this embroidery technique.
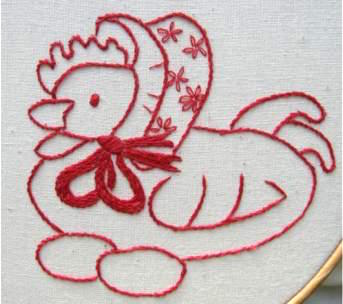
In the late 1800s, redwork embroidery took off as a popular pastime, thanks to its simplicity and low cost.
The name "redwork" comes from the red thread used, which was dyed from the roots of the madder plant, native to Asia and Europe.
Back then, creating the dye was no small feat—people had to dry, grind, and boil the roots to extract the vibrant red colour. These days, we’ve got it easy; we can simply pick up a spool of red thread ready to go.
In the early days, Turkey red was the only colourfast thread available, so it became the obvious choice for embroiderers.
Nowadays, we’re spoiled for choice with all sorts of thread types, but Turkey red still holds a special place in many stitchers’ hearts, thanks to its rich history and distinctive qualities.
Want to Give it a Try?
I'd love for you to experience the joy of redwork embroidery firsthand! Download my free redwork embroidery pattern below and let's get stitching together!
Victorian Elegance: Redwork's Place in History
Following the lavish decorations of crazy quilting, redwork became the go-to technique for sprucing up everyday household items, transforming them into charming, almost childlike pieces of art. Think of:
- Decorative coverlets, quilts, cushions, and pillow covers that added warmth and character to any room.
- Graceful dresser scarves that added a touch of sophistication to the boudoir.
- Playful toys and laundry bags that brought a smile to the face.
Naturally, there were also more traditional household items, each carrying the delightful touch of redwork embroidery.

Penny Squares: A Traditional Trend
In the early 1900s, embroidery was really popular, especially "Penny Squares." These were small pieces of cloth with designs printed on them, ready for people to stitch over.
After embroidering these squares, people would sew them together to make attractive quilts.
The most popular designs were of two characters: Sunbonnet Sue and Overall Sam (sometimes called Bill). Quilters have loved these designs for years because they're so cute.
A big influence on this trend was an artist named Kate Greenaway. She drew lovely pictures of children in old-fashioned clothes, and many people used her drawings as inspiration for their embroidery. Her work still inspires us today.
The Charm of Lettering
Did you know that old-fashioned redwork designs sometimes included words?
You’d often see phrases like “Good Morning,” “Good Night,” or “Sweet Dreams” written in fancy lettering.
This made each piece feel more personal and meaningful, as thought was made for someone special.
Getting Started with Redwork Embroidery
Pattern Selection for Newcomers
Have you ever looked at a child’s colouring book?
Those simple line drawings are great for redwork! Just make sure you respect the artist’s copyright if you want to sell anything you make. With a little creativity, you can turn these pictures into lovely, one-of-a-kind designs for your own use.
You might find sets of designs that all follow the same idea, like the 12 months of the year.
Don’t worry if a set feels like a lot! Start with one design and take your time to get comfortable with it before trying another. This way, you’ll grow your skills and feel more confident, so you’ll be ready for trickier projects later on.
Fabric Choices for Redwork
Now, let's look at the best fabrics to use for Redwork.
You'll find lots of lovely patterns online that you can trace or iron onto your fabric. The two best choices are muslin and calico.
These are the names used in the UK. If you live somewhere else, you might know these fabrics by different names.
Muslin
Muslin is a simple cotton fabric that’s great for embroidery.
It’s light, soft, and easy to handle, which makes it a good choice if you want something gentle and delicate for your project.
Calico
Calico is a bit thicker than regular cotton, so it’s good for making things that need to last.
Once you’ve picked your design and material, you’re ready to start sewing. I’ll be here to help you with each step as you go.
Essential Stitches for Your Palette
This craft is simple and quick, which makes it great for beginners or people with busy schedules.
To start, you just need to learn a few basic stitches.
The Fab Four Stitches
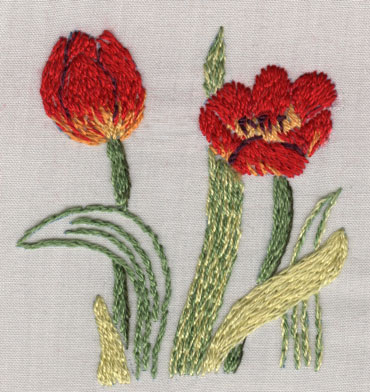
- Stem Stitch: Ideal for outlining your designs.
- Split Stitch: Perfect for filling smaller areas with stitches.
- Satin Stitch: Use this to cover larger sections with a smooth, shiny finish.
- French Knots: Add texture and depth to your design with these tiny knots.
The Stem Stitch vs. Outline Stitch Debate
When you’re stitching the outline of your design, you’ll usually use one of these two stitches. Here’s how it works:
- For outline stitch, keep the thread above the line you’re stitching.
- For stem stitch, keep the thread below the line you’re stitching (if you’re working from left to right).
This makes the stitches look like twisted ropes, twist in opposite directions!
If you are left-handed (and work from right to left) the thread position will reverse, so it will be held below your stitching line for outline, and above for stem.
Its all in the detail
What about those little details that make your design special?
You can use French knots or lazy daisy stitches for small dots or extra touches. These stitches add a nice finishing touch to your embroidery.
So, don't be afraid to experiment and play with different stitches to create contrast and add those delightful details.
FAQs
Question: How so I launder red work embroidery?
Question: How so I launder red work embroidery?
Answer: Glenda asked this question and you will find my reply here.
What did you think of this page?
Did it give you all you needed or did anything else spring to mind? If there was something missing give me a shout – or let me know if this page proved helpful (do let me know which page you are commenting on).
Would you like a direct reply? Just pop your email address below, and I'll be in touch.
Stay connected between projects
If you’d like occasional updates from my embroidery room, including new patterns, gentle tips, and little things I think you might enjoy, you’re warmly invited to join the Stitchin’ Times newsletter.
No pressure. Just a friendly note now and then to keep you inspired.
You Might Like These
Colcha embroidery
An introduction to the technique of colcha embroidery from New Mexico
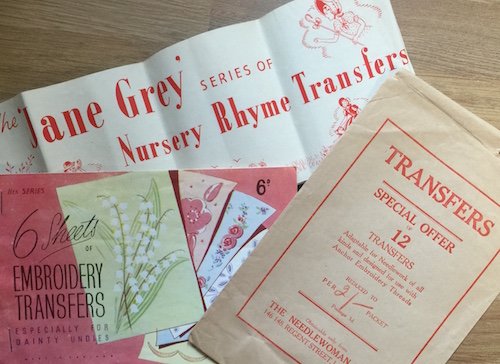
Iron On Transfers: Create Designs with Easy Application
Having trouble finding iron on transfers for hand embroidery? Here are some alternative ways to get your pattern onto your fabric
Hand embroidery for beginners - Supplies, Fabric and Design Transfer
Learn hand embroidery with this beginner’s guide! Discover essential supplies, fabric choices, and simple design transfer methods to start stitching today.


Copyright © Carol Leather - 2006-2024
About Me - Contact Carol - Privacy Policy - Site Map - Testimonials
Please do not copy the content of this site. It is protected by Copyscape.
Copyright © 2006- www.needlework-tips-and-techniques.com All rights reserved