- Home
- Intro to blackwork
- Free Blackwork Charts
The first of my free blackwork charts
Free blackwork charts like this one will get you up and running with a new technique in a jiffy.
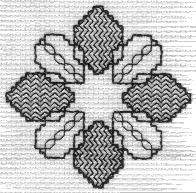
The following blackwork instructions will explain how to work this little coaster design in double running stitch, which results in the back of the work looking as neat as the front.
For more information, and step-by-step instructions don't forget to check out my Blackwork for Beginners e-book.
If you are a cross stitch fan I have some free patterns for you too.
What do you need?
- A 5" square piece of Aida 14 count (or evenweave fabric if you are already used to stitching on it),
- some embroidery floss (it doesn't have to be black)
- a size 24 tapestry needle
- small embroidery hoop
Free blackwork charts - step 1
Start by printing this page so you have the chart to hand whilst stitching.
Take 2 strands of cotton/floss and thread your needle. I have made a quick video showing an easy way to separate the strands.
We will start with the outlines.
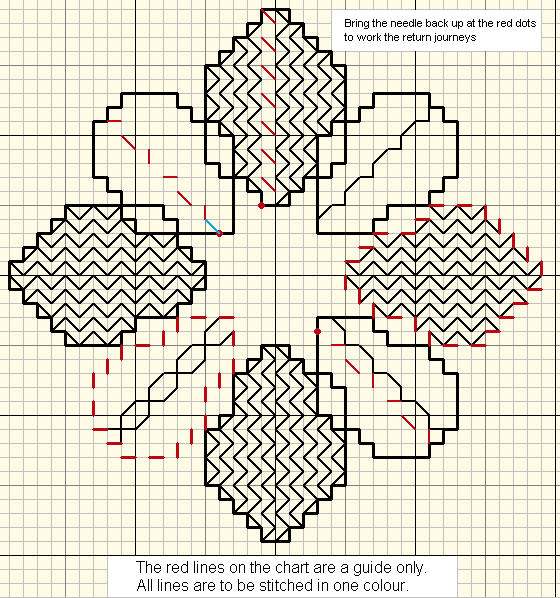
Looking at the chart, can you see there are two different shapes of petal? We will start with the one that has the zigzag fill inside it, on the right-hand side of your chart.
I outlined it in a dashed red line. Each red line represents a running stitch. Work your way around the petal stitching all the red lines then when you arrive back at the beginning again, reverse direction and go around again, filling in the gaps to create a solid outline.
If you run out of thread, use the stitching you have already done to secure the end. Attach the new length of thread to this as well.
Next work the outline of the other petal shape. I have designed this chart so you do not have to count across long distances. If you turn your chart around so that the diagonal petal with the red dashed outline is at the top, it will enable you to just run your thread under a few outline stitches ready to start again.
Continue turning the chart and stitching the outlines until they are all in place.
Starting the fill patterns
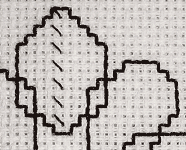
Work each red line as a running stitch down the length of the petal. Remember to leave space for the return diagonals.
Now we will move on to the first fill pattern. This is a super simple one of just one outward and one return journey. Again we will stitch it in double running stitch. Not all of my free blackwork charts use fill patterns, some are motifs without a fill.
Making sure your chart is the right way up (so you can read the words) attach a single strand of thread to the outside edge of the first petal, where the diagonal red line slants down to the right.
Work each red line as a running stitch down the length of the petal. Remember to leave space for the return diagonals.
When I have taught this at workshops, many students started the next stitch on the same horizontal line as the first one which will not work.
When you reach the other end of the petal, towards the center of the design, bring the needle back up at the red dot and continue back up to the top of the petal, filling in the gaps as we did with the outlines.
Continue to fill this petal in the same way, moving across towards the sides of the petal, to first fill one side, then the other with the pattern.
The second blackwork fill pattern
The pattern in the alternate petals is easy, but a little more involved. I have split it four steps on your chart to make it easier to follow.
Again with the chart the right way up (so that the petal with the single red dashed line is at the top left) attach a single strand of thread to the outside edge at the position of the red horizontal line.
Carefully following the chart, as the stitches change directions, work across the petal in a running stitch. At the centre, bring the needle back up at the red dot and work the first return stitch (coloured blue). Continue across the petal filling in the gaps to get the result shown in the top right petal on the chart.
Repeat this procedure following the red lines in the bottom left petal on the chart, turn at the red dot and complete the pattern on the way back.
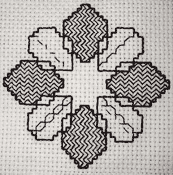
I hope you have enjoyed stitching this little blackwork design with me and have realised that it is not as difficult as it may appear. You will find more free blackwork charts on this site.
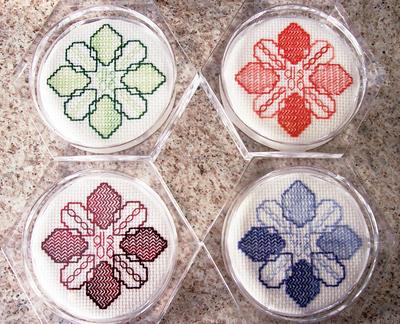
A visitor to the site, LuAnne, has shared her photo of her gorgeous multi-coloured blackwork coasters below.
What did you think of this page?
Did it give you all you needed or did anything else spring to mind? If there was something missing give me a shout – or let me know if this page proved helpful (do let me know which page you are commenting on).
Would you like a direct reply? Just pop your email address below, and I'll be in touch.
Stay connected between projects
If you’d like occasional updates from my embroidery room, including new patterns, gentle tips, and little things I think you might enjoy, you’re warmly invited to join the Stitchin’ Times newsletter.
No pressure. Just a friendly note now and then to keep you inspired.
