- Home
- Needlepoint
- Leaf Stitch
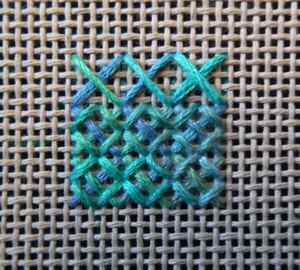
Needlepoint Leaf Stitch and Variations
If you’re just starting with needlepoint, the leaf stitch is a gem to have in your repertoire. It’s easy to learn and endlessly versatile.
With just a few straight stitches, you can create a charming leaf shape—perfect for adding texture, detail, or even bold focal points to your projects.
Let’s explore the basics, a few creative variations, and some ideas to make this stitch your own.
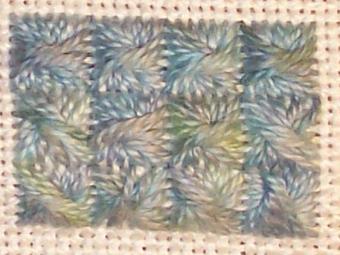
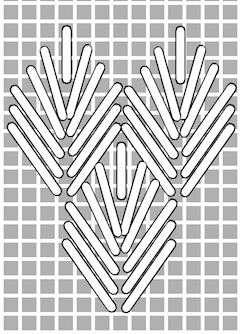 An arrangement of leaf stitches
Before You Start: Planning and Preparation
Before starting to stitch, take a few moments to prep. A little planning goes a long way in ensuring your work looks polished and professional.
Count and Measure
First, count the threads in the area you’ll be stitching to ensure there’s enough room for your leaf motif. This helps avoid crowding or uneven spacing.
Choose the Right Materials
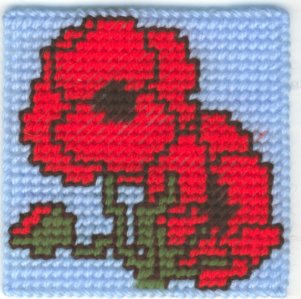
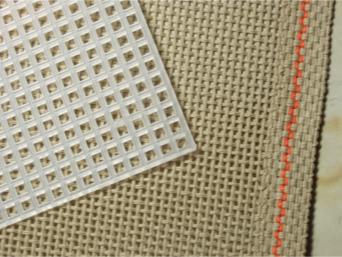
Opt for a firm, even-weave canvas for the best results. Pair it with high-quality threads or yarn for smooth, long-lasting stitches. My go-to is a sturdy 14-count canvas—it’s beginner-friendly and forgiving.
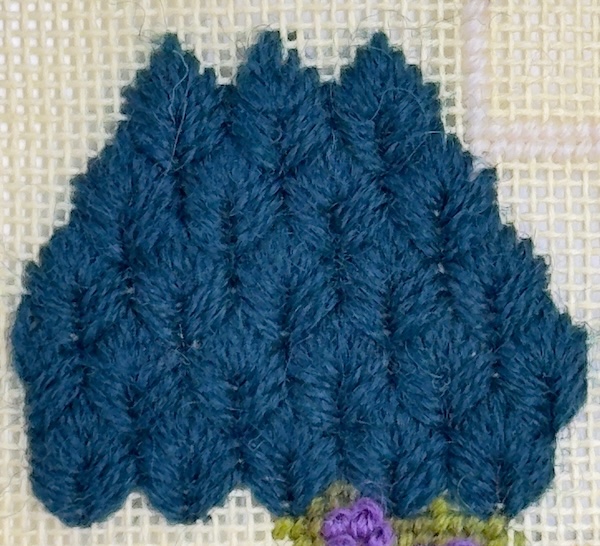
Mind Your Tension
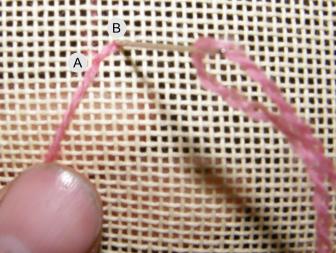
To achieve a professional-looking result, it's essential to maintain consistent tension in your canvas. Aim for a balance that's neither too tight nor too loose, but "just right."
With a little practice, you'll develop the skill to find this sweet spot, ensuring a smooth and even finish.
Test First
Before beginning your project, stitch a small section on scrap canvas to get a feel for the pattern and test your colour palette. This quick step can save you frustration later on.
How to Work the Basic Leaf Stitch
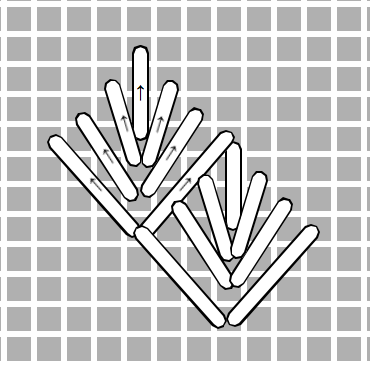
The leaf stitch is really a combination of a number of straight stitches worked in the form of a motif that resembles a leaf shape. These leaf stitches can be fitted together to create an overall background pattern with an attractive texture
Each motif will cover nine canvas intersections in height and six in width. You can use compensating stitches to fill in around the edge of the area if necessary.
Here’s how to create the classic leaf stitch step by step:
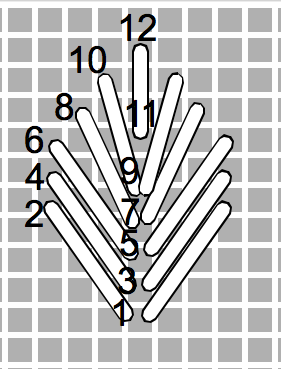
To begin, start with a slanted stitch in the centre, spanning 3 intersections and going up 4. This sets the angle for the next two stitches, which follow the same direction.
Then bring the needle up through the hole marked 7 in the diagram and down again one diagonal thread above and to the right of point 6.
Repeat the process for the stitch from points 9 to 10.
The top stitch is vertical and covers 3 canvas threads, going down at point 12.
Continue by working the other side of the stitch starting the stitches at the outer edge and taking the needle down in the same odd numbered holes that were previously used.
Get Creative: Applications for the Leaf Stitch
Don’t let the name fool you—the leaf stitch is about more than leaves! Here are a few fun ways to use it:
Nature-Inspired Designs
Green threads make fantastic hedgerows or foliage. Swap to autumnal hues for seasonal charm.
Holiday Projects
A miniature Christmas tree stitched with leaf motifs, complete with a sparkly metallic star on top. (see the mini tutorial below).
Whimsical Patterns
Arrange leaves into flower petals, feathers, or even borders for an imaginative touch.
Textured Backgrounds
Repeat the stitch to fill larger areas with a textured look—it’s a subtle way to add visual interest.
Colour and Design Tips
Think Beyond Green
Leaves don't have to be green! Experiment with variegated threads, vibrant oranges, or soft pastels to add character to your designs.
Layer for Dimension
Start with darker threads as a base, then layer lighter tones on top for a 3D effect.
Overdyed Threads
These are fantastic for capturing the natural variations in leaf colouring.
A Quick Project Idea: Miniature Tree Design
Feeling inspired? Try this quick project to practise your leaf stitches:
Materials:
- 18-count canvas
- Light green crewel wool for leaves
- Brown wool for the trunk
Steps
- Use a fern stitch for the trunk.
- Add leaf stitches for the foliage, layering them as you move upwards.
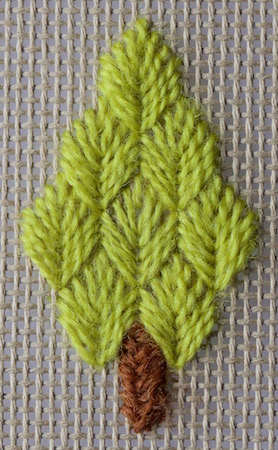
Worked in a bluish-green, with two extra leaves on either side of the bottom row, this would make a sweet little Christmas fir tree. Stitched on 18 count canvas it would be the ideal size for a greetings card. You could even stitch a little star at the top in metallic thread.
Varations of Leaf Stitch
Leaf Stitch With a Stem
Love a bit of flair? Add a central stem in a contrasting colour for extra pop.
You can take it below the base of the leaf stitches for an extended stem.
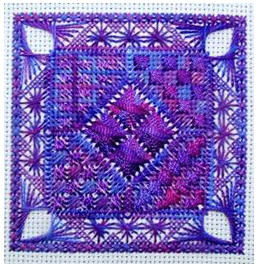
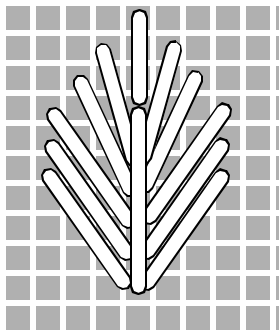 Leaf stitch variation
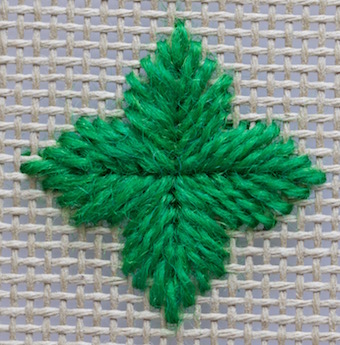
Four-way Leaf Stitch
Or, arrange four leaves in a star shape—it’s a simple way to create stunning floral motifs.
These could be stitched side by side with the squares between them filled with tent stitch.
Diamond Leaf Stitch
Another variation of this needlepoint stitch can be worked over a smaller area, using just four stitches on each side. This is sometimes known as Diamond Leaf Stitch.
This is certainly one of those needlepoint stitches that can be utilized in many ways to add interest to a design. I do hope you will give it a try.
Final Thoughts
The leaf stitch is simple yet endlessly creative. Whether you’re filling backgrounds or creating standout details, this stitch adds charm and dimension to any project. Don’t be afraid to experiment with colours, shapes, and variations—you might just discover a new favourite technique!
Share Your Creations!
Show off your projects on social media with the hashtag #LeafStitchCreations. I’d love to see your work and feature it in our next inspiration roundup!
What did you think of this page?
Did it give you all you needed or did anything else spring to mind? If there was something missing give me a shout – or let me know if this page proved helpful (do let me know which page you are commenting on).
Would you like a direct reply? Just pop your email address below, and I'll be in touch.
Stay connected between projects
If you’d like occasional updates from my embroidery room, including new patterns, gentle tips, and little things I think you might enjoy, you’re warmly invited to join the Stitchin’ Times newsletter.
No pressure. Just a friendly note now and then to keep you inspired.


