- Home
- Rice Stitch
Rice Stitch
Rice stitch is a very useful needlepoint stitch to learn, as it can be used in so many different ways. It is simple to work, on either canvas or cross stitch fabrics.
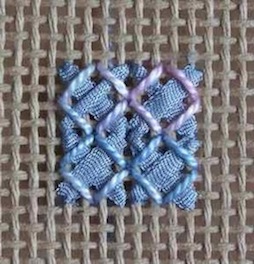
Basically it consists of a large cross stitch (in the photographs below I have worked over 4 canvas threads but you can also work over 2) with its "arms" crossed by further stitches in each corner. These smaller stitches can be worked in the same thread, as in our first example, where a variegated cotton was used for both "layers".
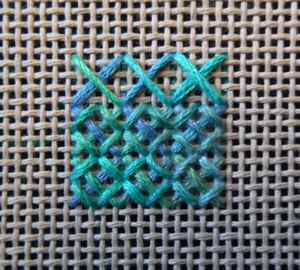
The photograph below shows the second layer in progress, with the top 3 crosses still to have the additional stitches worked on top of them.
When the top layer is completed it gives a woven textured look to the stitched area.
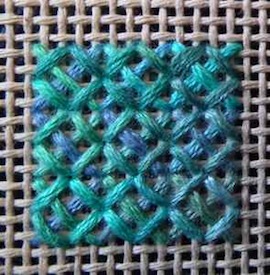
Things can get really exciting when you work rice stitch using different fibres or threads for each layer.
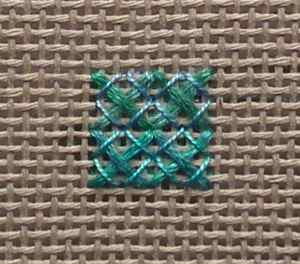
In the photo below I used a fine rayon thread for the second layer which alters the effect considerably. It looks as though a fine net has been overlayed on top of the large cross stitches here.
The next photo shows the large crosses worked in 2mm silk ribbon. Here the corner stitches are worked in a variegated cotton over the top, giving a totally different effect.
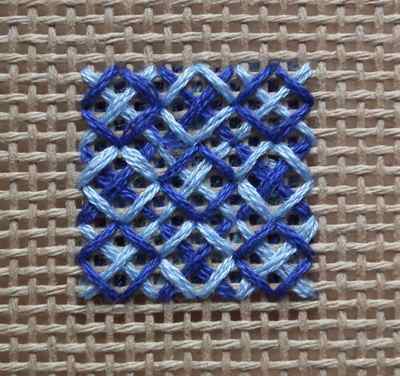
In the next example I stitched alternate cross stitches in two shades of blue.
The corner stitches were then worked in the alternate colour to the first layer to give the effect of differently coloured diamonds with a tiny cross in the center. Quite different from the effects above, but still the same stitch.
Triple Rice Stitch
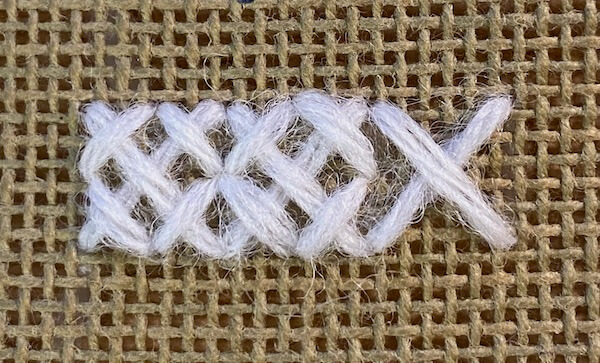
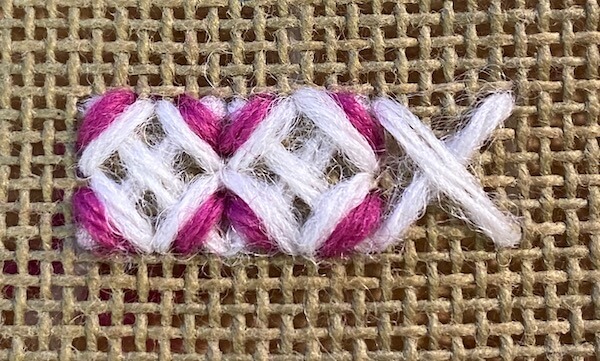
You can also alter the number of tie down stitches crossing the "arms" of the original cross stitch. The following sequence of photos show the stages of creating triple rice stitch where two extra stitches are added in cerise crewel wool on top of the basic rice stitch (worked in white).
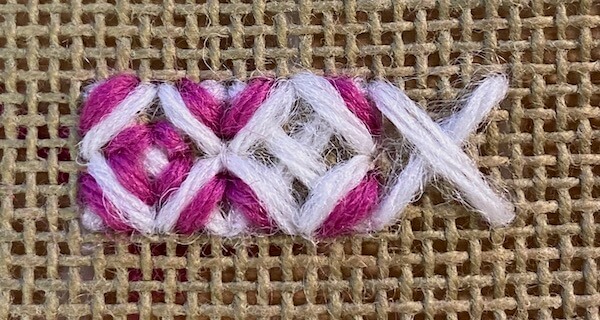
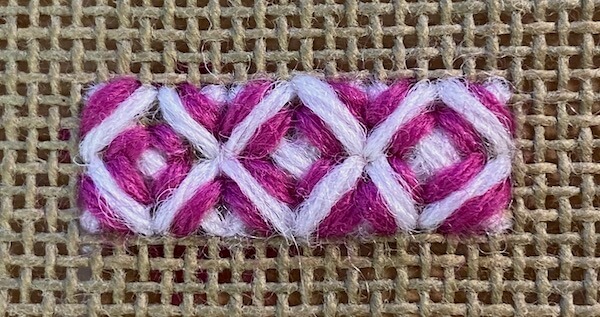
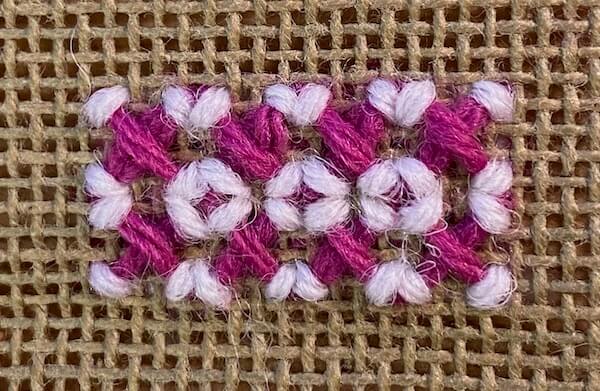
A different effect entirely can be created if you only do the outermost of these three tie down stitches, as shown below. This sample was worked with the basic cross over 4 canvas threads, where those above were worked over 6.
So how do we work this stitch?
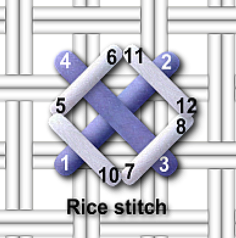
The diagram on the right shows the sequence of stitches. As you can see it is a very simple stitch to work.
This diagram shows the stitch worked over 2 fabric or canvas threads, whereas my stitched examples were worked over 4 canvas threads. There is nothing to stop you using both in the same project.
So have some fun, and try out different types of thread, different colours and changing which you use for the first layer.
Rice stitch is quick to work and well worth learning.
Where to use Rice Stitch
I used it in my tranquillity design, one of the Textures to Dye For range of downloadable needlepoint patterns, for the textured rectangles just inside the border.
It is a great stitch for filling in background areas, or for adding a textured effect to a design to give contrast to smooth areas stitched in tent stitch.
It can be just as easily stitched on Aida, evenweave or canvas, making it very versatile.
Other names by which it is known include crossed corners cross stitch and William and Mary stitch.
Variations
As well as varying the threads used, as above, you can combine other stitches to give variations.
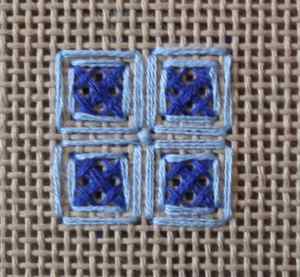
One such example is given the apt name of Captive Rice Stitch, shown above. Here straight stitches "box in" the crossed corners cross stitches.
Stay connected between projects
If you’d like occasional updates from my embroidery room, including new patterns, gentle tips, and little things I think you might enjoy, you’re warmly invited to join the Stitchin’ Times newsletter.
No pressure. Just a friendly note now and then to keep you inspired.
